Tips for Capturing the Colors of Sedona's Red Rocks
Understanding the Unique Colors of Sedona's Landscape
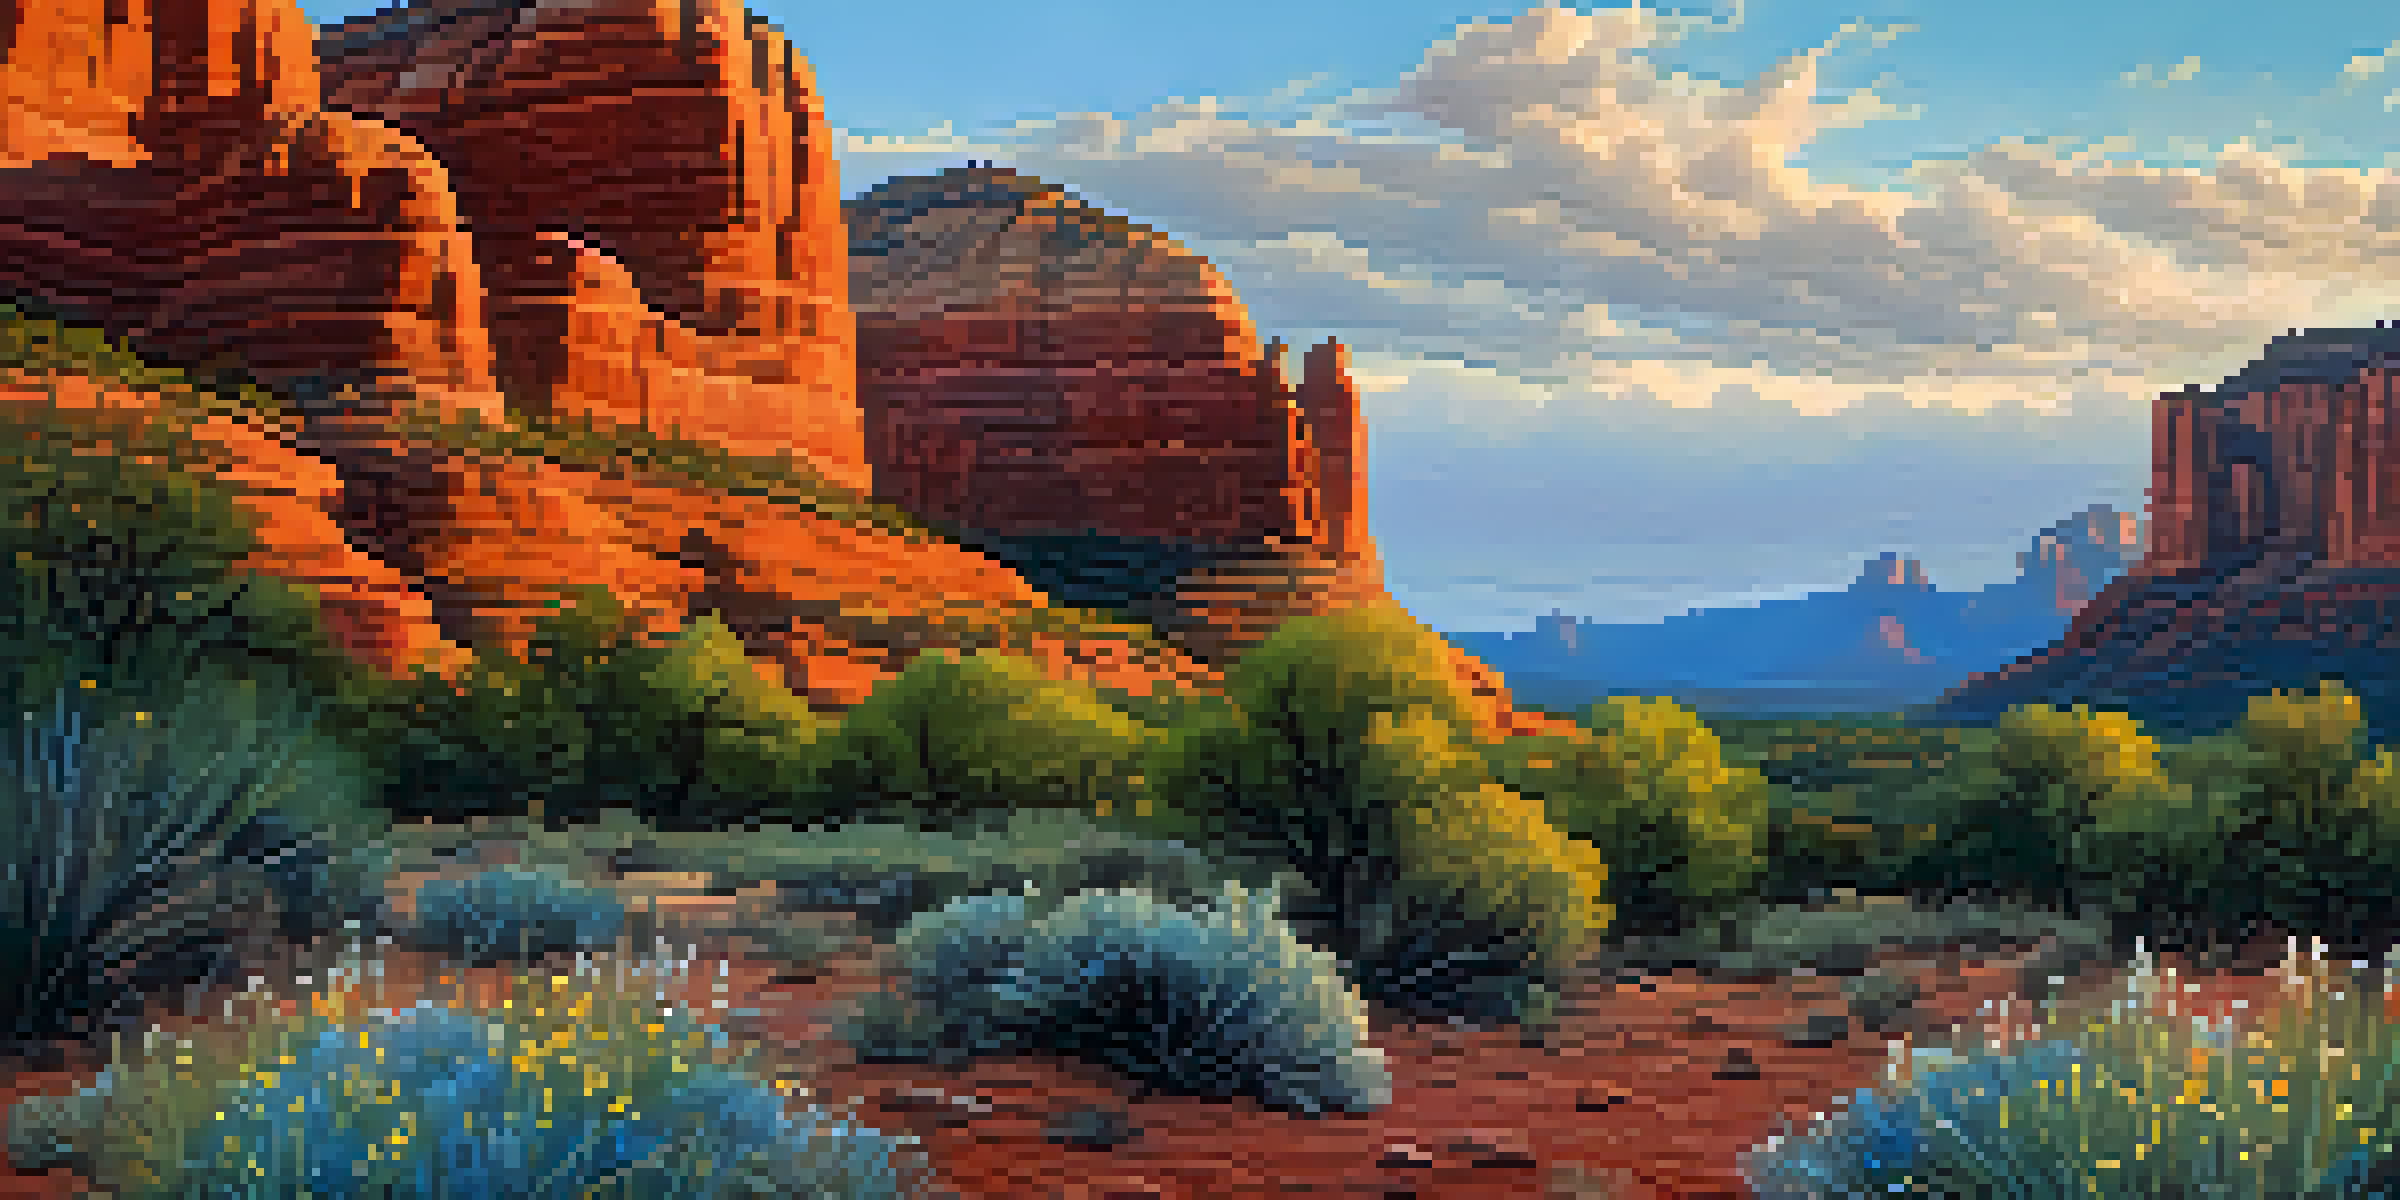
Sedona's red rocks are famous for their striking hues, ranging from vibrant reds to earthy browns. These colors are due to iron oxide in the sandstone, which reflects sunlight in a way that creates dramatic visual effects. Knowing this can help you appreciate the landscape, especially during different times of day.
Photography is the story I fail to put into words.
For instance, the early morning light often casts a warm glow over the rocks, making them appear even more vibrant. Conversely, sunsets bring out deeper, richer shades, creating a stunning contrast with the sky. Understanding these nuances enhances your photography experience, allowing you to capture the best moments.
Ultimately, the more you know about the landscape's colors, the better prepared you'll be to showcase them in your photos. So, before you grab your camera, take a moment to study the environment and its unique characteristics.
Choosing the Right Time of Day for Photography
Timing is everything when it comes to capturing Sedona's stunning landscapes. The golden hour—just after sunrise and before sunset—offers the best lighting conditions. During this time, the soft, diffused light enhances the red rocks' colors, making your photos pop.
Midday sun can be harsh and create unflattering shadows, which may wash out colors. If you must shoot during this time, look for shaded areas or consider using a polarizing filter to reduce glare. This simple tool can help bring out the richness in colors and improve contrast.
Sedona's Colors Change with Light
The unique hues of Sedona's landscape vary dramatically with the time of day, enhancing your photography experience.
So, plan your photography sessions around these key times. By doing so, you’ll be able to take advantage of the natural light that showcases Sedona’s beauty at its best.
Utilizing the Right Camera Settings
Understanding your camera settings can make a significant difference in your photography. For capturing the vibrant reds and oranges of Sedona, consider using a lower ISO to minimize noise and enhance image quality. This is especially important in bright conditions where detail matters.
The best camera is the one you have with you.
Experimenting with aperture settings is also crucial. A wider aperture (like f/2.8) can create beautiful background blur, emphasizing your subject, while a smaller aperture (like f/11) keeps more of the scene in focus, which is great for landscapes. Understanding these settings allows for greater creativity in your shots.
Additionally, don’t forget about white balance. Adjusting this setting can help you retain the true colors of the landscape, ensuring your images reflect the breathtaking views you see in person.
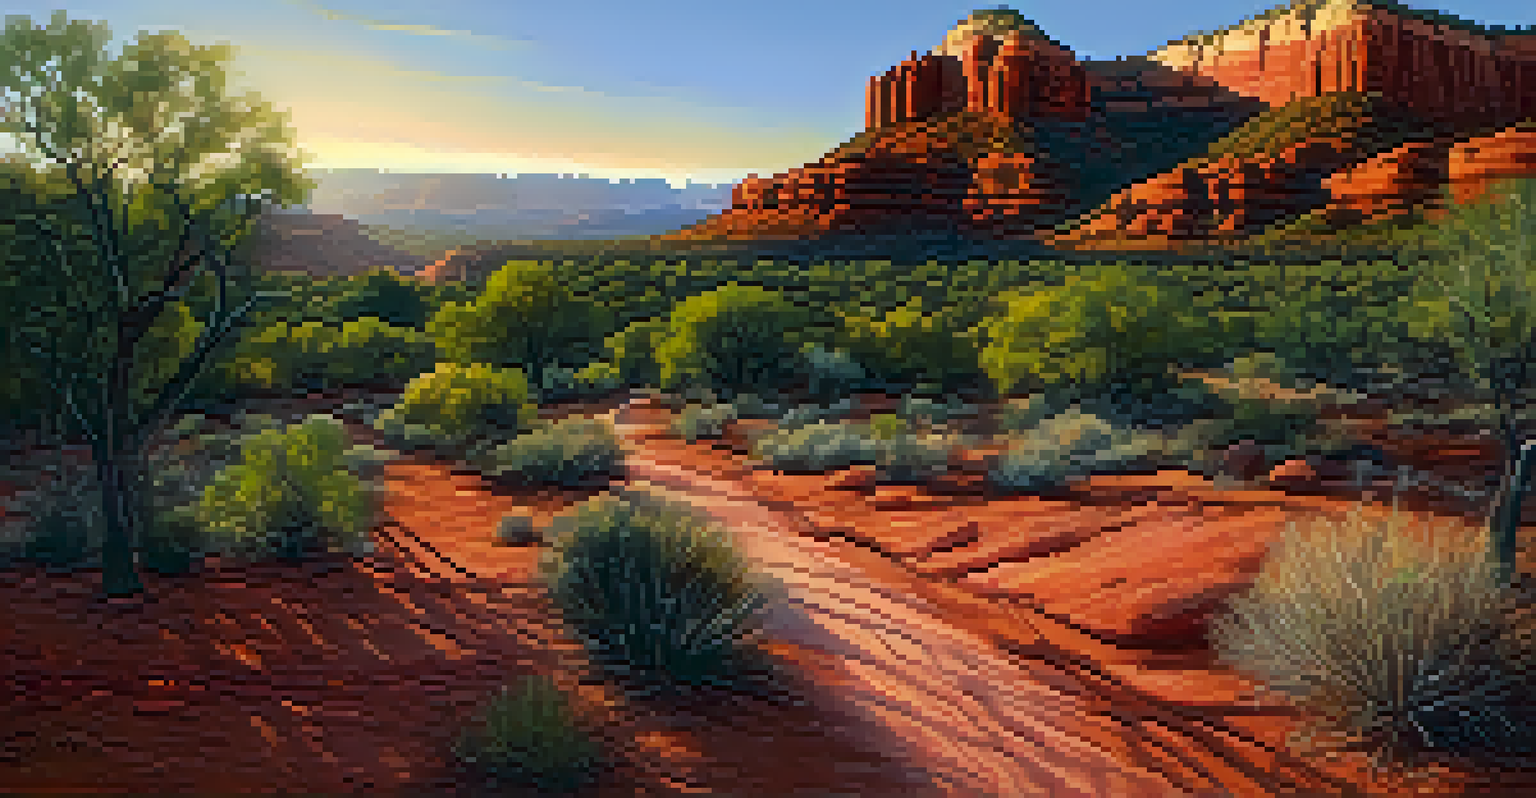
Framing Your Shots with Natural Elements
Incorporating natural elements into your composition can elevate your photography. Look for foreground objects like cacti, wildflowers, or even a winding path to frame your shot. This adds depth and context, making your images more engaging and telling a story.
Using the rule of thirds can also help you create balanced and visually appealing compositions. Imagine dividing your frame into a grid of three sections both horizontally and vertically—try to position the key elements of your scene along these lines or at their intersections.
Perfect Timing for Photography
Capturing Sedona's beauty is best achieved during the golden hour, which offers soft, diffused lighting for stunning images.
By thoughtfully considering your composition, you can create stunning photographs that not only capture the colors but also convey the beauty of Sedona’s unique landscape.
Embracing Different Perspectives and Angles
Sometimes the best shots come from unexpected angles. Don't hesitate to get low to the ground or find a higher vantage point. A different perspective can reveal new colors and details that you might miss from eye level.
For instance, shooting from a lower angle can emphasize the grandeur of the red rocks, making them appear even more imposing. Alternatively, capturing the landscape from above can provide a stunning overview of the vibrant colors and patterns that define Sedona.
Experimenting with various angles will not only enhance your creativity but also help you discover the unique beauty of Sedona that many miss.
Post-Processing Tips for Enhancing Colors
After capturing your images, post-processing can be a powerful tool to enhance the colors. Software like Adobe Lightroom or Photoshop allows you to adjust saturation, contrast, and sharpness, ensuring your photos reflect the stunning beauty of Sedona.
However, it’s essential to strike a balance; over-editing can lead to unnatural colors. Aim for adjustments that enhance the vibrancy without losing the authenticity of the scene. For example, you might boost the reds slightly while ensuring the sky retains its natural blue.
Experiment with Angles and Composition
Using natural elements and varying your perspectives can create more engaging and dynamic photographs of Sedona's landscapes.
With a little care in post-processing, you can create images that not only document your experience but also evoke the emotion and beauty of Sedona’s landscapes.
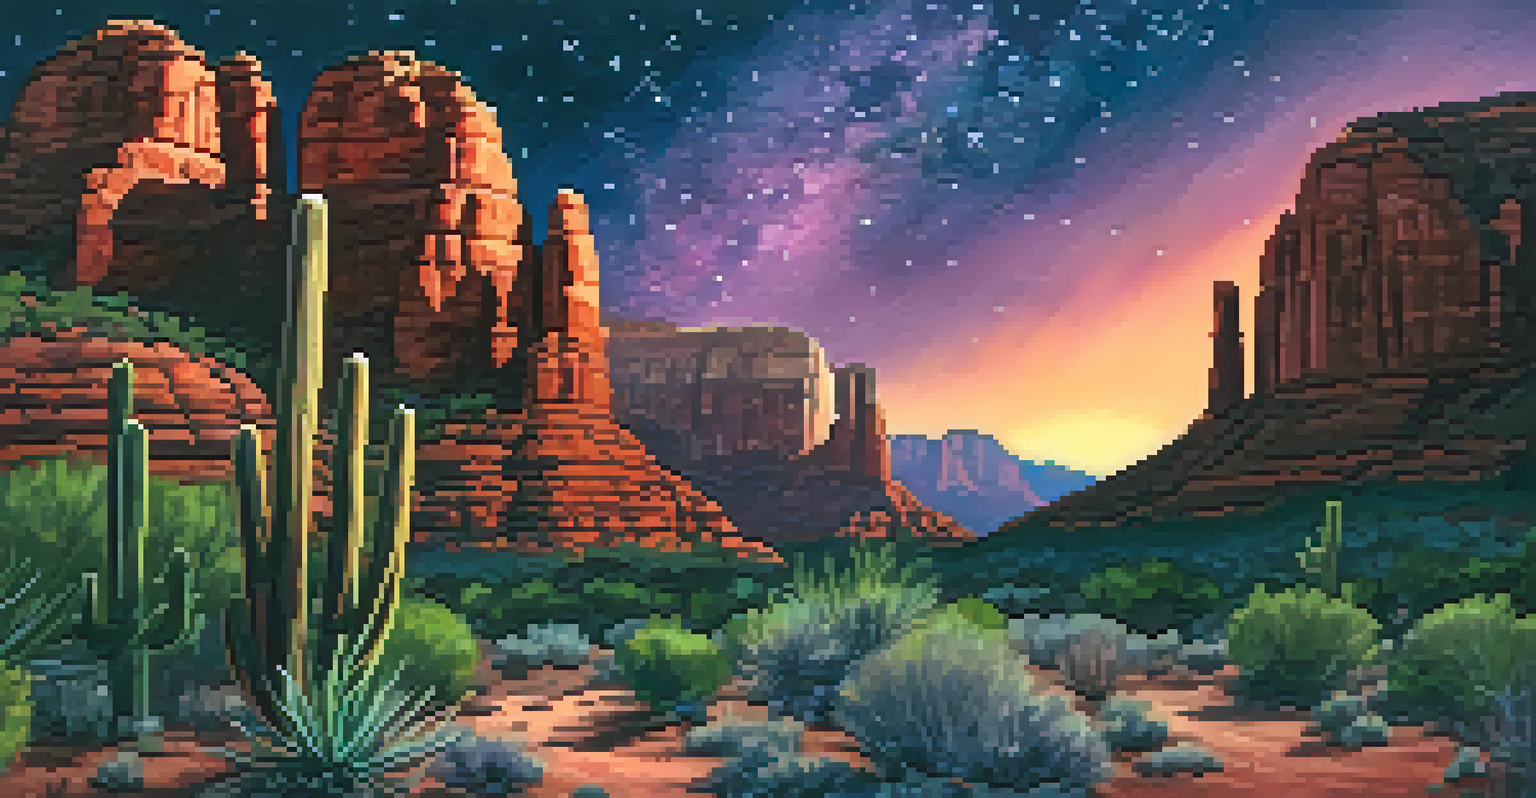
Capturing the Magic of Sedona's Night Sky
Sedona isn’t just breathtaking during the day; its night sky offers a magical backdrop for photography as well. With minimal light pollution, it’s a fantastic location for astrophotography. Capture the stars and the Milky Way above the iconic red rocks for truly stunning images.
To photograph the night sky, use a tripod to keep your camera steady during longer exposures. A wide-angle lens with a low aperture setting will help you capture more light and detail. It’s also helpful to use manual focus to ensure the stars appear sharp.
Night photography can be challenging but rewarding. With patience and practice, you can capture the enchanting beauty of Sedona after dark, showcasing yet another facet of this remarkable landscape.